Tag Archives: vegan

Cremini Kale Winter Porridge

naturallylivinginthemaritimes.com

On it’s own, this recipe is a great vegetarian meal.  It also tastes wonderful when you add chicken.  Most vegetables were sourced from the Summerside Farmer’s Market. Great leftovers!  This is another original from the Naturally Living in the Maritimes kitchen!

Gluten-Free, Egg-Free, Soy Free, Vegetarian, *Optionally Dairy-Free & Vegan*

Ingredients

  • 2 tbs coconut oil
  • 1 onion, diced
  • 2-3 large cloves garlic
  • 5 or 6 cremini mushrooms
  • 3 leaves of kale, chopped
  • 1/2 cup broccoli florets
  • 1/2 cup diced tomato
  • 1 tsp rosemary
  • 1 tsp black pepper
  • 1 tsp salt
  • 2 tbs chili powder
  • 1 cup coconut water
  • 2 cups vegetable broth
  • 4 cups filtered water, divided
  • 2 tbs butter (or Earth Balance, for dairy-free)
  • 1 cup brown basmati rice
  • *Optional* 2-3 chicken breast, cooked and chopped.

Directions

  1. Soak brown basmati rice for 30 minutes.  While rice is soaking, chop and prep your vegetables.
  2. Saute onion and garlic in coconut oil until aromatic. Add kale, mushrooms, broccoli, tomatoes, and liquids to pot.  Add in spices and stir thoroughly.  Bring to a boil.
  3. Start rice.  Dispose of soaking water and add rice to a separate pot, adding 2 cups of water.  Bring to a boil, then simmer for 20 minutes. Do not stir.
  4. Once at a boil, bring temperature down and simmer for 15-20 minutes.
  5. Transfer to a blender and puree soup mixture. Add butter and mix through as it melts.
  6. Return to a pot and transfer rice in.  Stir thoroughly. *If adding chicken, add chopped pieces and mix thoroughly.
  7. Serve.  Leftovers should be refrigerated.

This recipe is great when you have additional winter vegetables that you’re looking to get rid of and want a hearty meal that has a good serving of leafy greens.  We all know they’re hard to fit into your daily meals!  This is a great dish with the added protein from the mushrooms and does incorporate the “Umami” flavour that many vegetarian dishes don’t have.  You’ll certainly feel satiated with this dish!

Make Your Own Alternative Milks & Flours – Almond & Coconut

altmilkflour

As I’ve mentioned briefly, I’m going gluten free.  Grain free really.  I’ve decided that due to gastrointestinal and autoimmune issues, I’d like to work towards healing nutritionally. Doing my research and through familial suggestion, I’ve decided that the Specific Carbohydrate Diet (SCD) is the route to go. This said, I’m going rice, corn, chickpeas, oats, wheat -free.

It’s daunting, I know.  And my biggest concern was how the heck am I going to bake? I need some treats! What will I do for Christmas?

BREATHE, LAUREN.

It’ll be ok.  I’d already given A the green light to have bread and bagels in the home, I just need to stay strong.

And bake my own treats from almond and coconut flour.

And make my own flour directly from said ingredients. Here’s how:

Almond Flour: Almond flour is a wonderful choice for us as we like to make our own almond milk and the flour can be dehydrated and saved as a great by-product, creating NO waste from our project. This step-by-step process will provide you with BOTH products.

Ingredients:

  • Almonds (2 cups)
  • Filtered Water (4 cups)

Directions:

  1. Soak your almonds.  You’ll want to put your almonds in a jar and cover with water, enough to give a head of about 2 inches above them. Leave for 1-3 days, depending on how creamy you like your milk.  A and I left ours for three days and it turned out wonderfully.  We soaked about two cups and ended up with a cup of almond flour.
  2. Drain your almonds and peel. When the almonds are done soaking, drain the water and begin to peel your almond skins. If you pinch from the bottom and push the skin up and off, it’s much easier than picking it off.
  3. Blend. Take your peeled almonds and put in a blender with 4 cups of water and blend.  Our blender is small so we had to do multiple batches. When you have it blended completely, strain through a nut bag or cheese cloth.  You don’t want any little chunky pieces in your milk & you don’t want to lose any of that flour.
  4. Store your milk in the refrigerator. Milk separates so you’ll need to give it a good shake before using. Also, it’s shelf life is short so you’ll need to keep an eye on it.  Ours lasted for about 3-4 days.
  5. Dehydrate. Take your almond meal and layer it on your dehydrator sheets (or cookie sheet in the oven) and heat at 110 degrees (or as low as your oven will go).  You’ll have to keep an eye on it as you want to dry it but not kill the enzymes in your almond meal. Four to six hours is generally sufficient.  Every two hours, break it up a bit (it’ll harden together).
  6. Pulse. In a food processor, send it through a quick pulse to make sure it’s fine.
  7. Bake.  Have a blast with it.

DISCLAIMER: Almond flour is made of almonds and nuts are high in calories.  If you’re concerned about this, coconut flour might be a better choice for you.  These calories are nutrient dense though so it’s a GREAT flour for nutritional quality.

Coconut Flour: Coconut flour is also great as you can use the coconut milk to make great dairy-free yogurt! See Gutsy’s recipe here.

Ingredients

  • 2 cups Unsweetened Coconut Flakes
  • 4 cups of Filtered Water

Directions

  1. Soak. Fill a mason jar with 2 cups of coconut and 4 cups of boiled water. Let sit for thirty to forty five minutes.  I’ve found the longer it sits, the easier it is to blend.
  2. Blend. After it is done soaking, blend up as much as possible. Strain and separate coconut milk from pulp.
  3. Store milk.  Store in fridge.  Coconut milk has a slightly longer shelf life but will separate too so shake well before use.
  4. Dehydrate.  Same as the almond flour, put on a dehydrator sheet and let dry (breaking it up every two hours or so) for about four to six hours.
  5. Pulse. In a food processor, grind it until fine.
  6. Bake. 🙂

Photo Credit: Photo Credit: John Revo Puno via Compfight  CC

Achieving Umami in Vegetarian Dishes

naturallylivinginthemaritimes.com

Umami: Savory taste, one of the five basic tastes.

Umami has only recently been recognized in the Western world as a basic taste.  Humans, it has been found, have a taste for protein. Umami is the marker for that exact taste. It makes food hearty, robust, “filling” to your tastebuds. Umami can only be achieved by cooking something or fermenting it (aging).The key cause for umami is glutamate. That word might look familiar in some natural circles because its in one of those major ingredients you’re reading to avoid in packaged food: MSG – Monosodium Glutamate. Despite the fact that both the American and Canadian Health & Food regulatory agencies insist that MSG is fine for consumption, you might believe otherwise when you read more about the compound.  What was it that Michael Pollan so aptly said? Oh, yeah: Don’t eat anything your great-grandmother wouldn’t recognize as food.

Why are we avoiding MSG?

  • It’s an excitotoxin (like aspartame). It makes you feel good because it causes your brain cells to over exert an excite themselves to a point of damage or death.  According to Mercola.com, MSG is “potentially even triggering or worsening learning disabilities, Alzheimer’s disease, Parkinson’s disease, Lou Gehrig’s disease and more” (source)
  • Links to obesity
  • Eye damage
  • Headaches
  • Fatigue and disorientation
  • Depression
  • Cardiac Arrhythmia

Naturally occurring glutamate is fine. Its in vegetables such as mushrooms.  Ever wonder why a portobella mushroom really does fill you in the same way a slab of meat might? Glutamate.  Scientists aren’t sure as to why it occurs here as it’s not really high in protein, but I’m not complaining.  Pass the pulled mushroom tacos!

Where can you find Glutamate to create that umami taste in vegetarian options?

  • Tomatoes have it – We love a good vegetarian Indian curry with a tomato base.
  • As said above, anything with mushrooms. Portobello steaks are a go-to in the vegan world for a quick, healthy, meaty fix.  I love them in fajitas. Shitake work wonderfully, as do truffles.  NO, not the chocolate!
  • Soy Beans – I’m NOT suggesting go out and buy that Textured Vegetable Protein junk. I’m sorry for those of you who live on veggie dogs and fake-bacon… The processing kills ANY benefit from the soy. TRADITIONAL soy products like tofu (Acadian Soy Products located in Grand Pre, NS are an excellent source.  They sell at the Halifax Seaport Farmer’s Market) or tempeh are wonderful.  If you can get your hands on some quality organic edemame beans, you’re set to go!
  • Potatoes – I know some of you are nightshade haters, and that’s fine. You can skip this one and go on your merry way, but for those of us who are able to stomach them, potatoes are a great source of that umami flavour. Ever wonder why those french fries taste so freaking good? Well, here’s one of those reasons… (I won’t go into MSG, salt, junk, more junk, and even more junk… We’re talking homemade fries here!)
  • Sweet Potatoes – All of you paleo junkies, rejoice! Sweet potatoes fill that umami void in your primal heart.
  • Chinese Cabbage – Kim Chi anyone? How about sauerkraut? Wonder why that hit the spot? Could be that glutamate in your cabbage!
  • Carrots – Not only are they great for your vision, and getting that important source of beta-carotene, they’re a great source of glutamate.  Squash Carrot soup is always a great option for getting that full feeling from a winter weather treat.  My recipe will be up soon!
  • Cheese – If you choose to eat dairy products, a great raw cheese can be a great source of that umami flavour.
  • Avocado – What a great, versatile food.  You can even use avocado in puddings!
  • Nuts – I could eat mixed nuts all day.  This must be why!
  • Eggs – If you choose to eat eggs!  I never liked the taste on their own, myself.
  • Garbanzo Beans (Chickpeas) – How I went so long as to never try chickpeas, I will never know! My kitchen cabinets are not full unless I have some chickpeas on the go. Hummus anyone?

With this information, guests eating your veggie dishes will always leave your table feeling full!  In every recipe that’s veg/vegan I post, I always try to get a source of umami in there.  I was tired of feeding people and them telling me my food was too “light”. No one complains anymore. If you’ve got a “meat-maniac” in your family who you have to feed, try to get some of those super umami foods in there. They’ll love it and probably ask for seconds!

Resources

http://www.umamiinfo.com/2011/03/umami-rich-food-vegetables.php/

http://www.edenfoods.com/articles/view.php?articles_id=207

Photo Credit: Darwin Bell – via compfight cc

Indian-Spiced Harvest Vegetable Chili with Brown Basmati Rice

Indian-Spiced Chili

As promised, here is one of the first recipes to be created in the Naturally Living in the Maritimes kitchen.  I’m so excited to share it with you.  A loved it and really felt full: this is something we try to achieve to keep him going with a steady blood sugar.

Are you ready?

INDIAN SPICED HARVEST VEGETABLE CHILI WITH BROWN BASMATI RICE

Dairy-Free/Egg-Free/Gluten-Free  (Vegan)

Ingredients

  • coconut oil (enough for sauteing)
  • 1/2 tsp garam masala
  • 1 tsp chili powder
  • 1 tsp fresh ginger, grated
  • 1 tsp tumeric
  • 1 tsp curry powder
  • salt and pepper, to taste
  • 2 large garlic cloves
  • 1 15-oz can of chickpeas
  • 1 8-oz can tomato sauce
  • 1 cup of tomatillo sauce
  • handful of chopped kale
  • 1 cup corn (we used frozen)
  • 4 carrots, peeled and chopped
  • 1 onion
  • 1 cup brown basmati rice

Directions

  1. Begin soaking your basmati rice half an hour prior to the beginning of cooking. When rice is soaked, add to pot with two cups of water. (Ratio for basmati rice to water is 1:2). Bring to a boil and then simmer with a cover for approximately 20-25 minutes, until all water is soaked up.
  2. Saute onions in coconut oil until golden.  Add garlic and toast until aromatic.
  3. Add garam masala, chili powder, ginger, tumeric, salt, pepper and curry powder.  Stir until all is coated.
  4. Add chickpeas, tomato and tomatillo sauce, carrots and corn.  Heat through for about 5-10 minutes.  Add kale and cook for another 5 minutes until rice is finished.
  5. Serve chili on bed of basmati rice.

Extra

Left overs for this dish tend to taste even better.  Something about cooking everything in one pot and letting the flavours mingle overnight really does wonders.  Not to mention it makes for an easier clean up.

Wednesday Update: A bit about us, Kamut-Oat, Whole-Wheat Pumpkin Muffins, Kraut-Chi

whateverwed2

Today’s “Whatever-Wednesday” so I figured I’d throw a couple recipes out there.  Last night was grocery night so it ALSO ended up being a night of baking and fermenting.  It was nice to have the day off work because it meant A & I could work together in the kitchen and get a lot done.  The funny thing is: the two of us can spend hours together in the kitchen in good spirits but the moment we have to do dishes together… no way…

We’ve both figured out our own methods for doing dishes – I like to get them all done in one go, drying if need be – A hates to dry halfway through and doesn’t think the dish towel does as well as air drying; A likes to do them in two batches, and it makes the counter top look messy to me.  We need a dishwasher to solve this argument, but until then, we’ve determined the best way to manage is to avoid doing dishes together.

I managed to chat with a few other members from the Village Green Network and her writing gave me the push I needed to start some serious fermenting. Food Savvy from Halifax had a fun post about how she “stopped her hubby’s gas”.  This said, really, who doesn’t have gas?  But being as we’re aiming for a healthier lifestyle, and that I’m sure the 6 years of Diet Pepsi drinking (exclusively… I only drank water when I was REALLY thirsty) has ruined my gut, I figured now is as good a time as any.  So we picked up some red cabbage (A said, “why would anyone ever mistake that for red? It’s clearly purple”), farmer’s market garlic, carrot, ginger, caraway, juniper berries, mustard seed and a scotch bonnet and did our thing.  AND our handy-dandy Real Salt and filled some mason jars.

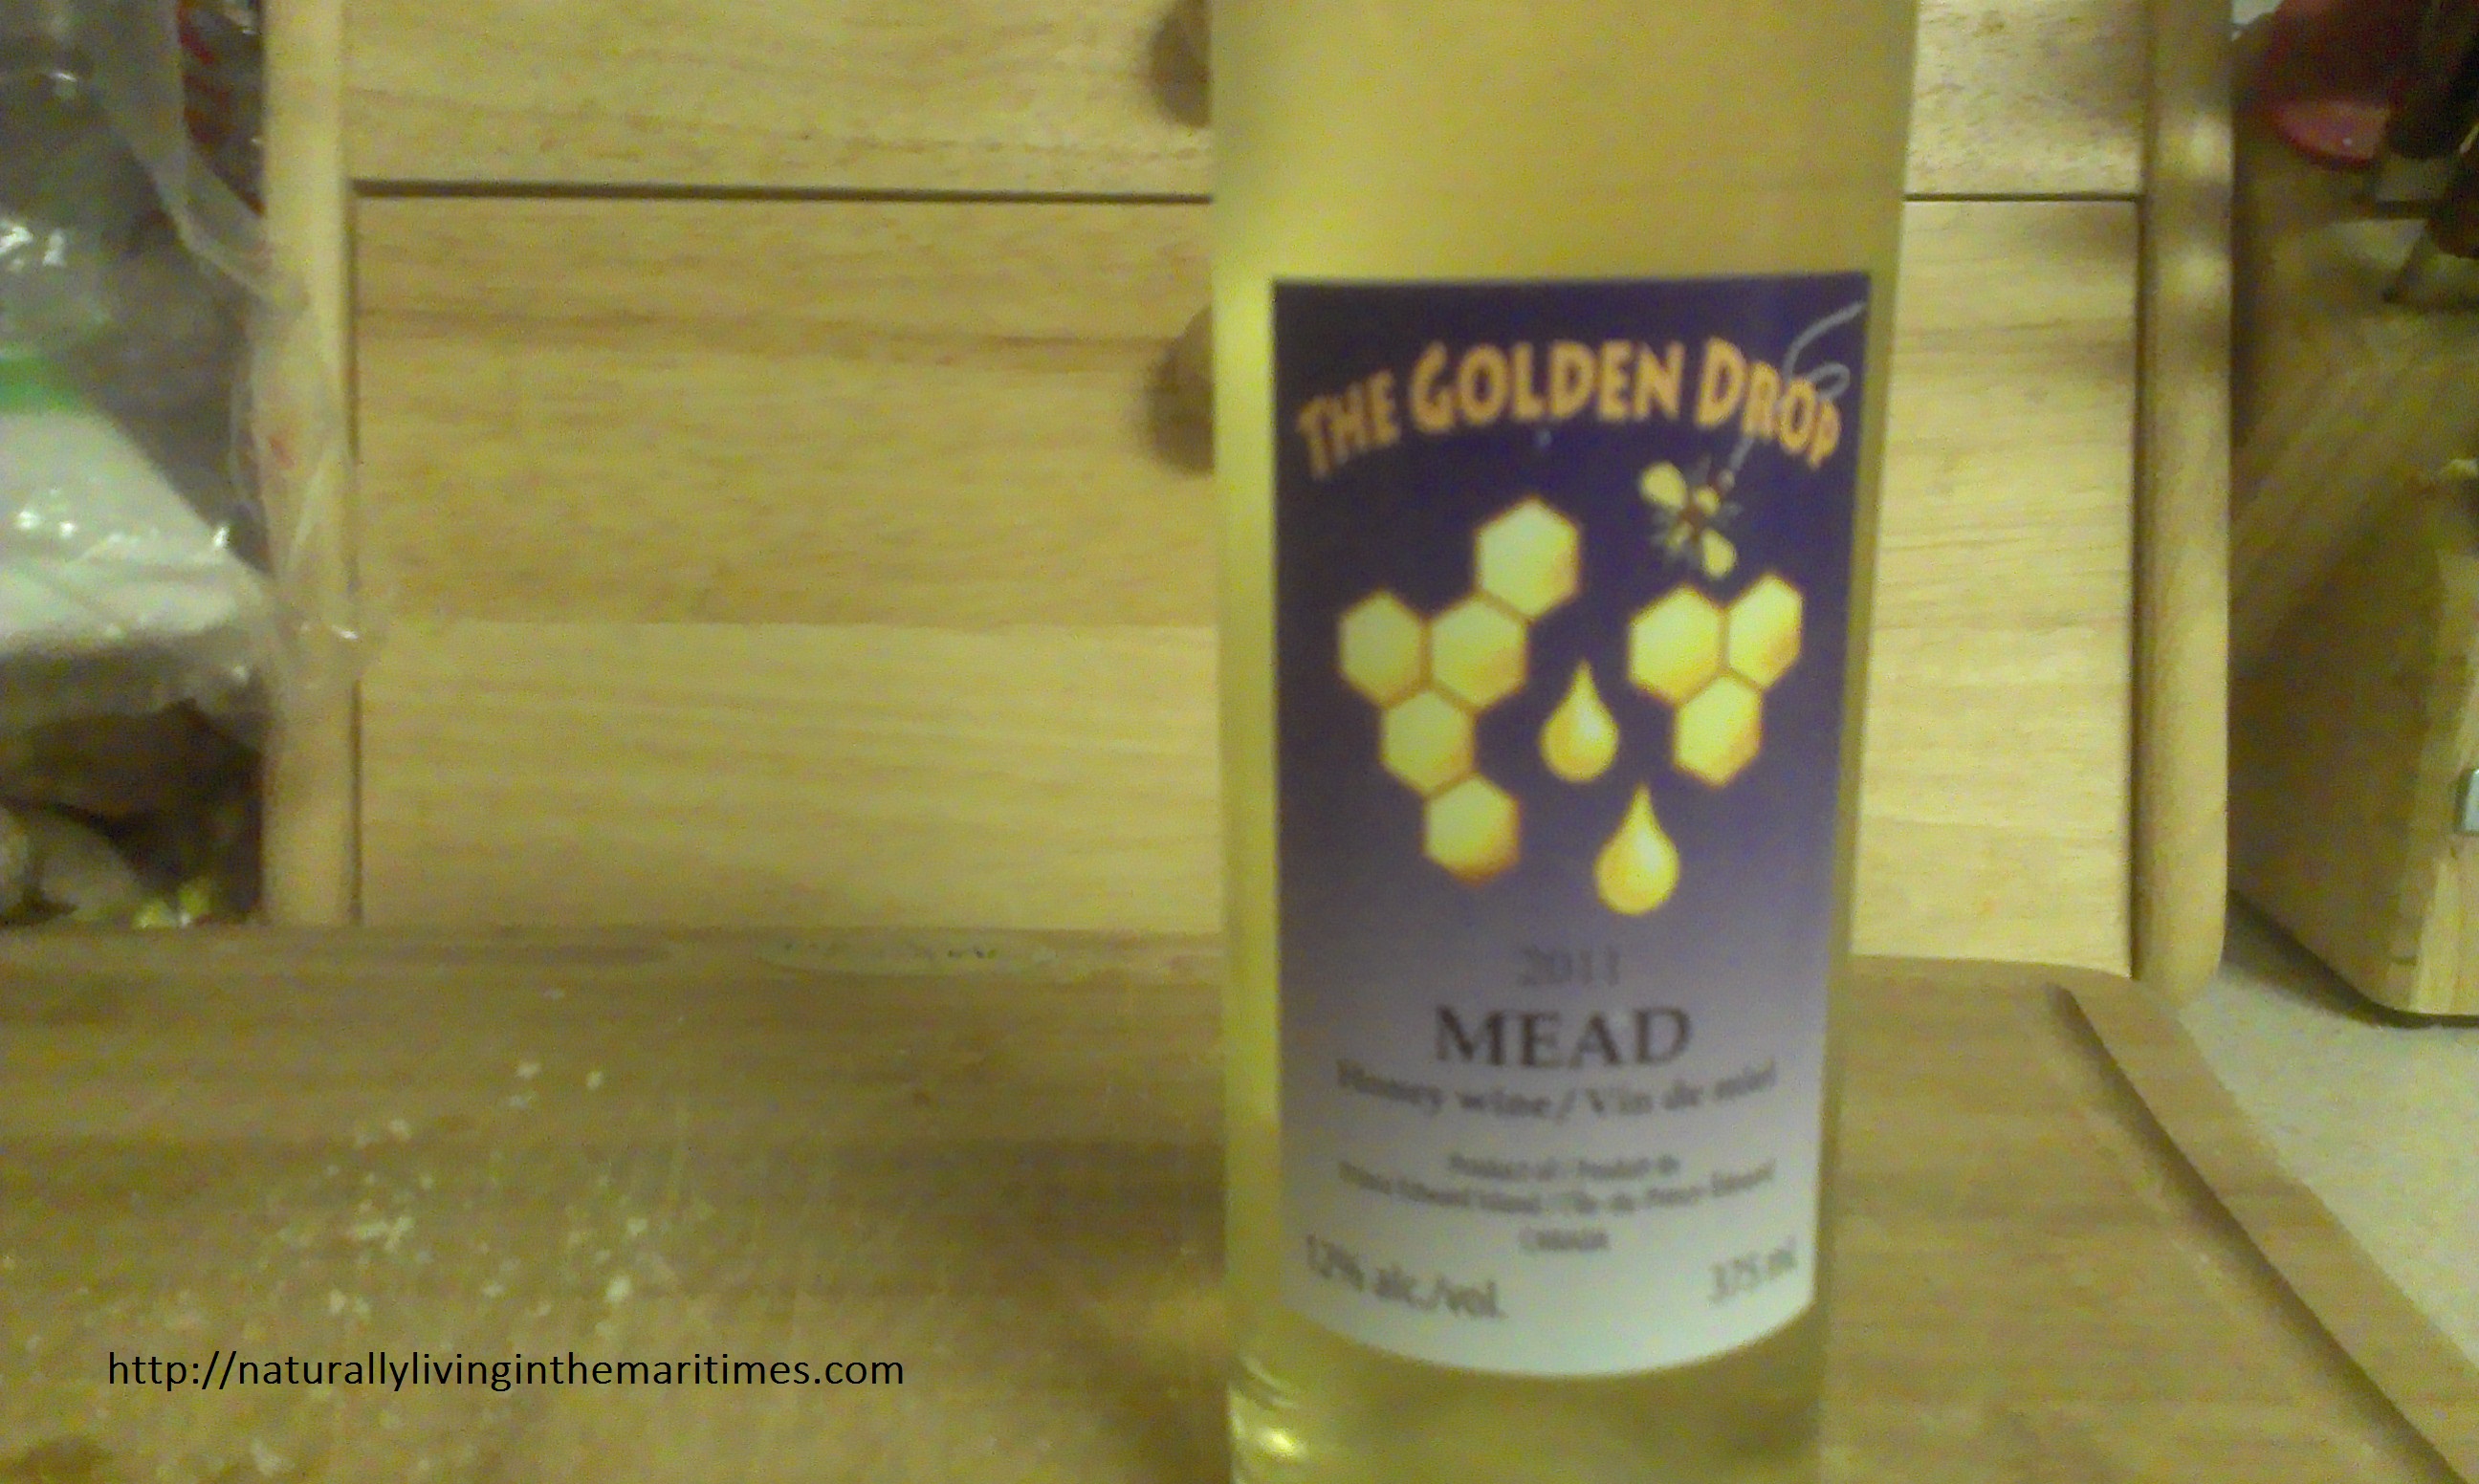
A few new things in our cabinet include Just Us’ Milk Chocolate (NO SOY LECITHIN) which is delicious.  Just Us’ whole philosophy is all about fair trade and sustainable practices.  While I was studying sustainability at Dalhousie, we had the pleasure of having a lecture lead by the Just Us founder.  The other new thing would be “The Golden Drop” Mead from PEI.  Neither one of us had ever tried mead before and we decided that before trying to brew it, we’d like a taste.  It was really good, with a honey flavour.  A decided he didn’t like it enough to brew so we think we’ll skip on that.  But it would be a good purchase from time to time.

whateverwed5

NLM Mason Jar Kraut-Chi (adapted from Sandor Katz’ “recipe“)

  • 3/4 large head of red (ahem…purple) cabbage
  • 3 big cloves of garlic
  • 1 orange scotch bonnet
  • 2 carrots, sliced thin
  • 3 inches of fresh ginger
  • 1 tbsp caraway
  • 1 tbsp juniper berries
  • 1 tbsp mustard seeds
  • filtered water
  • 2 1-litre mason jars with lids
  1. Finely slice your cabbage into small strips and add salt liberally as you go, piling them into a bowl.
  2. Squeeze the juices out of the cabbage with your hands.  The salt should have begun the process.  I took advantage of A’s manly hands, as mine were getting sore.
  3. Cut up and add in your scotch bonnet, garlic, carrots, ginger, and spices.  Mix all through thoroughly.  Take a taste test to make sure mixture is salty, but not too salty.  The salt is what helps ferment but keep your mixture safe. Adding hot peppers (like the scotch bonnet) also keep away mold.
  4. Begin to pack your jars as tightly as you can.  Add water (filtered) over top of your mixture, at least an inch.  You do not want your mixture above the water as it will begin to rot.
  5. Keep mixture out for about 5 days to a week, depending on how strong you want your ferment.  Then move your jars to a cool, dry place to slow the pace down.  After a week down there, they’ll be ready to eat.  You may want to let them sit longer, according to taste.

Our mixture is a beautiful purple colour with a bit of orange.  Very Halloweeny – perfect!

A and I have decided this might be a Christmas gift for a specific someone on our list.  We’ve decided this year to do a DIY Christmas – mostly because we’re broke, but also because it’s coming from the heart.  Every gift we do will be unique and specially thought out and made for that one person.  I think homemade gifts are the best and that’s always what I hope for around the holiday season.

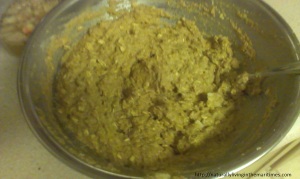
I was also in the market for a decently easy snack to make for A because he’d been low-blood-sugary all day.  His tell is often a headache, and he’d already taken two St. John’s Wort so I had to find something quick.  I found myself with left-over pumpkin from our Pumpkin Pie Baked Oatmeal from Mommypotamus, last week (delicious, by the way).  I’d done up my first pie pumpkin in the oven (very much like baking a squash) and mashed it up.  I’d been looking to do something with it and realized it’d been years since I’d made muffins, and hey! Isn’t that the organic Kamut flakes I bought on sale last week at the Bulk Barn…

NLM Kamut-Oat Whole Wheat Pumpkin Muffins (Dairy-Free) – (Adapted from KitchenTreaty)

whateverwed1

  • 2 cups whole wheat flour (we use Speerville Mills in Woodstock, NB)
  • 1/2 cup organic kamut flakes
  • 1/2 cup rolled oats
  • 1/2 tbsp baking powder
  • 1/2 tsp baking soda
  • 2 1/2 tbsp cinnamon
  • 1 tbsp nutmeg
  • 1 cup basmati rice milk
  • 1 tbsp white vinegar
  • 1 cup pumpkin puree
  • 3/4 cup sucanat
  • 1/3 cup coconut oil, melted
  • 1 egg
  • 1 tbsp vanilla
  • 2 tbsp brown sugar (for topping)

whateverwed4

  1. Preheat oven to 400.
  2. Add in pumpkin, egg, melted coconut oil, egg, vanilla and mix.  Mix rice milk and vinegar together and then add in (makes a mock-buttermilk).
  3. Once mixed through, add dried ingredients: flour, kamut, oats, baking powder, baking soda, cinnamon, nutmeg, sucanat.  Mix all together.
  4. Move mixture to a muffin tin and divide evenly into 12.  Add a sprinkle of brown sugar to the tops of each muffin to give a sugary crust. (I know, not healthy.  But delicious.  Moderation, right?).
  5. Bake in oven for 15-20 minutes (until crusts are crisp and a knife comes out clean) and let cool for five.

These muffins are hearty enough to keep A’s tummy from rumblin’ and his blood sugar from dropping.

We’re now officially 9 days away from our wedding and we’ve still managed to organize some delicious treats for this

week, including:

  • Fresh Raspberry Jam
  • Kamut Oat Chocolate Chip Cookies
  • Soaked Apple Crisp
  • Potato and Pepper Soup
  • Chickpea & Red Cabbage Tortilla Pizzas
  • Guac and Sprout Sandwiches
  • Corn & Chipotle Soup
  • and if we can wrangle some up at the farmer’s market this Saturday… Liver & Onions.  Neither one of us have ever tried liver before but after watching Real Food Con videos, I have to give it a shot.

I’m sure, just like last night, the bunny will be quite ready to help with all the scraps.

whateverwed3

Best wishes for another fantastic week and thanks for coming by.

Meatless Monday: Our Version of Indian Pilaf

pilaf

I decided I’d take the weekend off.  I needed some sleep and some rest, and just a bit of time with A before the big day.  Not to mention I was also working all weekend.

So, here we are: Meatless Monday.

And in honor of Meatless Monday, I’m going to treat you to one of our most favourite, meatless, budget-friendly recipes: Indian Pilaf, adjusted from Veggieful.  We have made it a little spicier (with the cayenne), removed the lime (too much for us), subbed coconut oil for olive, and added carrots for more flavour.

  • 1 tablespoon coconut oil
  • 1 onion, chopped
  • 2 cloves garlic
  • 1 head of broccoli, florets
  • 3/4 cups chopped carrots
  • 1/2 head of cauliflower, florets
  • 2 tablespoons of korma paste
  • 1 1/2 cups of brown basmati rice
  • shake of cayenne pepper
  • 1 cup chickpeas, soaked
  • 3 cups vegetable broth
  • Salt & Pepper to taste
  1. Chop all your veg (onion, garlic, broccoli, carrots, cauliflower) and get pan ready with coconut oil melting on medium heat.
  2. Add and saute garlic and onion until nicely browned.  Add your vegetables, rice and korma paste and allow all to mix in together.
  3. Once mixed, and before it burns (KEEP STIRRING), add your cups of broth, cayenne pepper and chickpeas.  Allow to simmer for about 25 minutes.  We find the brown basmati takes a little longer to soak up the broth.
  4. Add salt & pepper to taste.
  5. Serve.

We’ve found this recipe keeps us for three days of leftovers.  It’s very inexpensive for the amount of food you get out of it.  The chickpeas do give you the protein you’re looking for and a great Indian flavour.